Let's be honest: most audio editing software is way too complicated for simple tasks. If you just need to grab a quick highlight from a podcast, trim a song to make a ringtone, or clean up the start and end of a voice memo, you don't need a degree in sound engineering. You just need a tool that works.
Trimming is the simplest and most common form of audio editing — it's essentially keeping the "good stuff" and throwing away the rest. In this guide, you'll learn how to trim any audio file in seconds, completely free, without downloading a single thing.
What Does "Trimming" Actually Mean?
When you trim an audio file, you select the portion you want to keep and remove everything outside that selection. Think of it like cropping a photo — you draw a rectangle around the part you want, and everything else disappears.
This is different from cutting, which removes a section from the middle and joins the remaining parts. If you need to remove a mistake or an awkward pause from the middle of a recording, check out our guide to cutting audio instead.
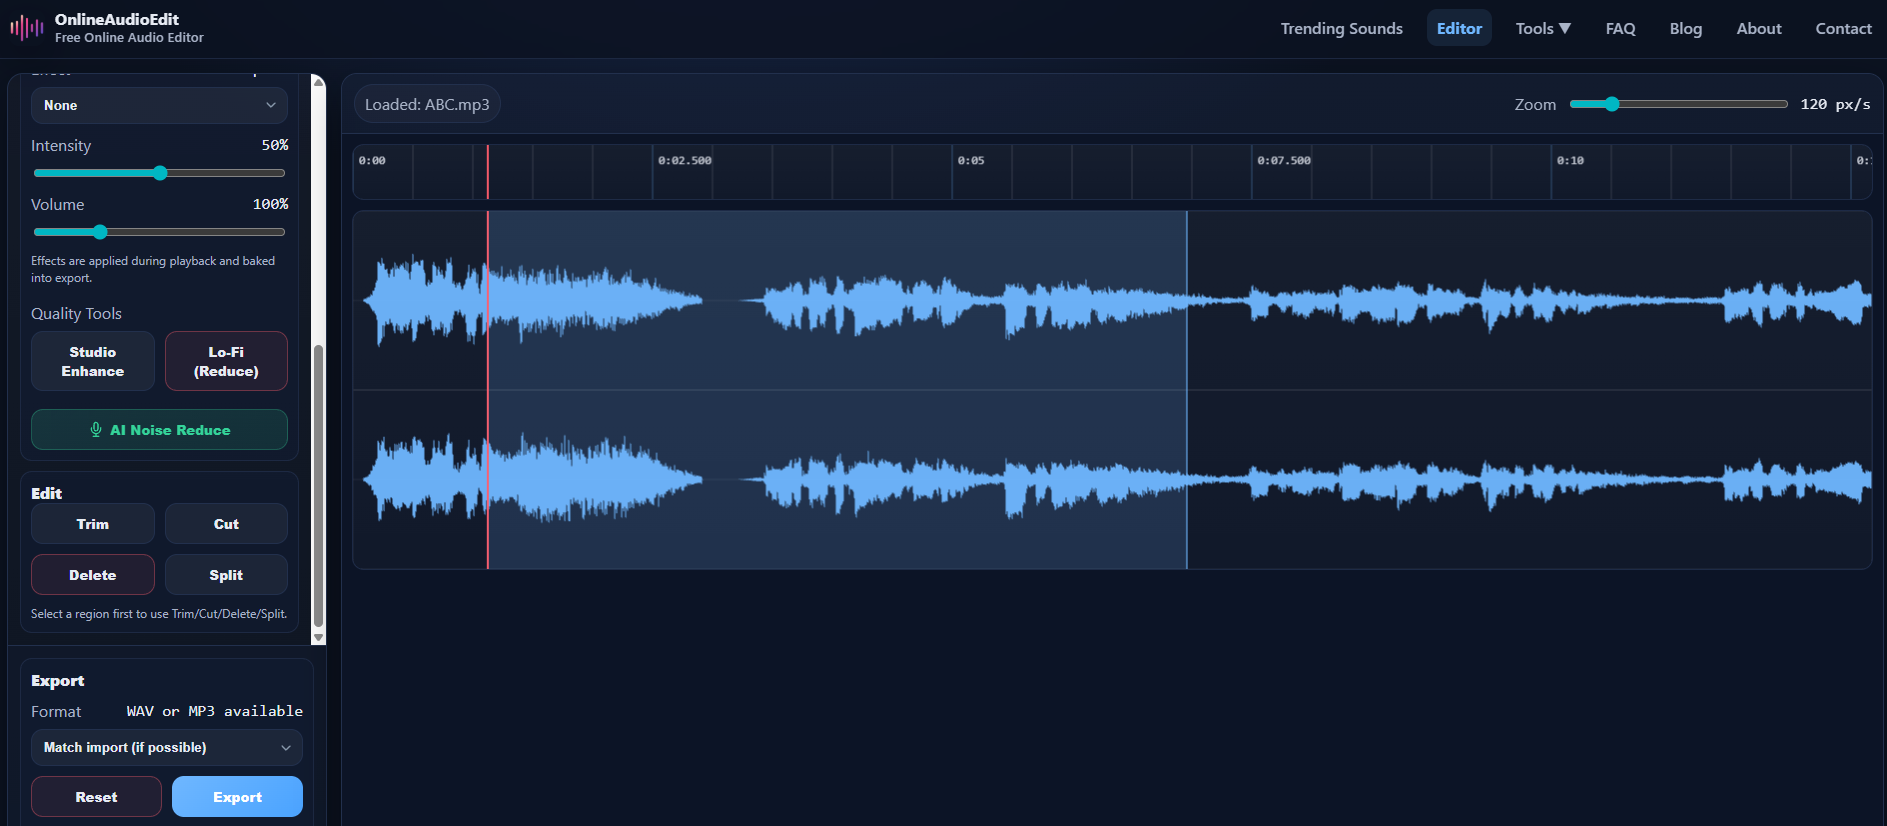
Step 1: Import Your Audio File
Head to the OnlineAudioEdit editor and import your file. The fastest way is to simply drag and drop your audio file directly onto the waveform area — MP3, WAV, M4A, AAC, OGG, FLAC, and more are all supported. You can also click the Import button in the sidebar to browse your files.
Once imported, your audio appears as a visual waveform — the blue peaks and valleys that represent the sound. Louder parts appear taller, and silent sections are flat.
Step 2: Find and Select the Section You Want to Keep
Click and drag your mouse across the waveform to highlight the region you want to keep. The selected area will be visually highlighted, and the duration will appear in the "Sel" indicator in the sidebar.
Pro Tip: Use the zoom slider in the toolbar to zoom in closer to the waveform. This is essential for precise trimming — it helps you find the exact start of a sentence, the first beat of a chorus, or the moment when the speaker begins talking. You can zoom from 20 px/s all the way to 600 px/s for frame-accurate control.
Not sure exactly where to start your selection? Click anywhere on the waveform to move the playhead there, then press Play to listen from that point. Once you've found the right spot, drag to create your selection.
Step 3: Click Trim
Once you've selected the region you want to keep, look for the Trim button in the Edit panel in the sidebar. Click it once, and poof — everything outside your selection is removed instantly. Your audio now contains only the selected portion.
Made a mistake? No worries. Click the Reset button at any time to restore the original audio and try again. Your original file is never modified — all edits happen in memory.
Step 4: Apply Enhancements (Optional)
Before exporting, you might want to polish your trimmed audio with some of the built-in quality tools:
- Volume Boost: If your trimmed clip is too quiet, use the Volume slider to boost it up to 400%.
- Studio Enhance: One-click enhancement that adds compression, clarity, and normalization — great for voice recordings.
- AI Noise Reduction: Remove background hiss, hum, or fan noise from your trimmed clip. See our full guide to AI Noise Reduction.
Step 5: Export Your Trimmed Audio
Click Export in the sidebar. Choose your format:
- WAV — Lossless quality, perfect for professional use or further editing. Files are larger.
- MP3 — Compressed, smaller files ideal for sharing on social media, email, or podcast platforms.
- Match import — Tries to export in the same format as your original file.
Not sure which to pick? Our WAV vs MP3 comparison guide breaks down the differences in detail.
Common Use Cases for Trimming
Here are some real-world scenarios where trimming is the perfect tool:
- Creating ringtones: Trim a song to just the chorus or your favorite 30-second section. Check out our ringtone creation guide.
- Podcast highlights: Extract the best moments from a long podcast episode to share as clips on social media.
- Voice memos: Remove the dead air at the beginning and end of a quick recording.
- Music samples: Isolate a specific section of a song for use in a video project or presentation.
- Lecture recordings: Trim down a long class recording to just the important parts before sharing with classmates.
Trimming vs. Cutting vs. Splitting — What's the Difference?
These three operations are closely related but serve different purposes:
- Trim: Keeps the selected region, removes everything else. Best for extracting a clip.
- Cut: Removes the selected region, joins the remaining parts. Best for removing mistakes.
- Split: Divides your audio into separate clips at the selection boundaries. Best for breaking a long recording into parts.
Ready to try it? Head to the OnlineAudioEdit editor and start trimming your first clip — it takes less than 30 seconds.